Job 27 - Fixing the Brake Pipes to De Dion
First job of the day was to fix the brake pipes to the De Dion, using the pop riveter for the first time (What a great tool, very satisfying to use - wonder if I will say this by the end!). As described in the manual we fitted the brake union and then the brake pipes to that. Once connected we manoeuvred the long (LHS) pipe into position and secured brake pipe into the caliper before fixing the pipe with P clips and rivets.
 |
| Using the Pop Riveter for the first time. :-) |
 |
| All 3 brake pipes fixed, before removing the calipers & De Dion Ears |
Job 28 - Fitting the Propshaft
Before we went any further we positioned the propshaft in the Gearbox and rested on the tubing above at the back of the passenger compartment. An easy job.
Before we went any further we positioned the propshaft in the Gearbox and rested on the tubing above at the back of the passenger compartment. An easy job.
 |
| Bolted to the LSD |
Job 29 - Filling the LSD
I decided to follow the instructions at this stage and having contacted Derek about which fluid to use he advised the 80W-90 for the LSD and the 80W-80 for the gearbox, so we built a funnel it.
 |
| Funnel for filling the LSD |
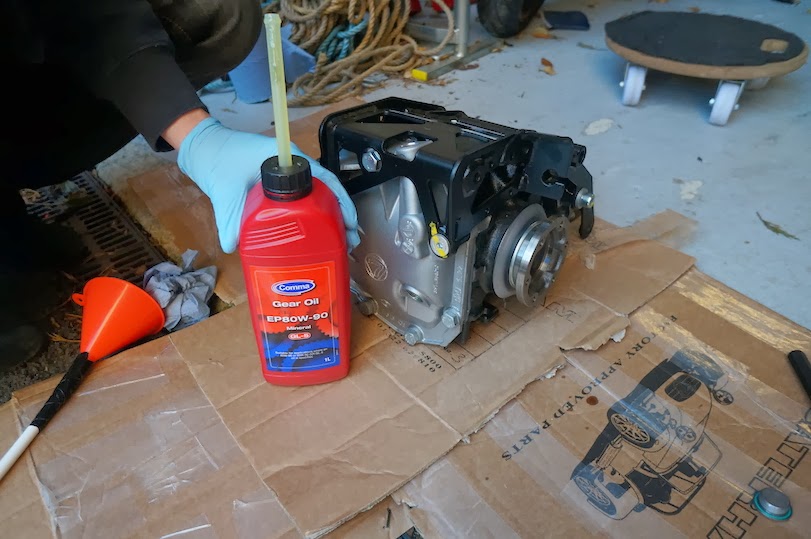 |
| Only to find the bottle has a tube for exactly that purpose!
Job 30 - Fitting the LSD
Having heard numerous nightmares about fitting the LSD we started cautiously! Using the jack to lift the LSD under the car we located 2 screwdrivers through the mounts into the top mounts of the Diff Carrier. We then inserted the lower bolts and measured up to get an idea before inserting the shims. We fitted 2 shims to each side giving centring the diff to about 1mm. The easy bit done according to others, the tops being harder to fit!
At this point we made sure that the handbrake cables were fed through underneath the top 'mounting screwdrivers' and the RHS nylon adjuster attached to the Diff Carrier.

Right hand side of the LSD

Left hand side of the LSD
Having taken the boot floor out of the car it made access to insert the top bolt much easier. Taking one of the screwdrivers out and applying lots of copper grease to the 11" bolt I placed it in and started to tap it through from underneath whilst Alex inserted washers in between the Chassis and Diff mounts. As I knocked the bolt through it knocked the screwdriver out and hey presto we were there. Easier than we thought!

LSD looking through the boot floor
|
No comments:
Post a Comment