30 January 2014

Day 16 - Headlight Construction & Airbox (2.5 hours)

Constructing the headlights is well described in the manual, a rarity! It still took a considerable amount of time as I was in the lounge watching TV at the same time, a bit warmer than the garage. :-)

Job 53 - Indicator Pods - IVA Indicator rubber

This ended up being a pain of a job, getting the rubber to stick to the Indicator Pod. I ended up mocking them up and then applying glue to half the mount and fitting the rubber for half the rubber and placing on the bench with a can of paint on top of it. Once the first half was done I used glued the rest using a zip tie to secure the awkward bit at the back of the mount near where the headlight mount locates.

Job 54 - Indicators

Once the rubber had stuck, I installed the indicator into the pod which is as described in the manual.

Job 55 - Headlights & Heat shrinking

Having taken off the original rubber sheathing, I decided to fit some proper heat shrink to the cables, using a 7mm heat shrink for the headlight cables.

Once threaded through the headlight I used a 10mm heat shrink to include the green indicator wire to keep all the wiring tidy before threading through the metal headlight mount.

Inside the headlight - The heat shrink just protruding out the top
Having completed the headlights I can now look to mount them and then the Anti-roll Bar and Radiator. :-)

Job 56 - Airbox

I thought i'd finish off with a nice little job before Katey arrived home. There are no instructions for fitting the airbox, so this is how i did it.

Mounting bobbins  for the airbox
Airbox base with rubber beading around the inlet 
Ford paper air filter - I was surprised it wasn't a K&N or something similar - A future upgrade maybe?! 
Connection Pipe and airbox lid fitted

23 January 2014

Day 15 - Wiring Connection, Accelerator Cable, Clutch Pipe & Fuel Pipe (4 hours)

I spent the evening tinkering in the garage after work with Dale Carter (a neighbour).

Job 49 - Engine Wiring Connections

I set Dale to reading the manual to see if he could fathom out some of the connections! We took a step at a time.
  • Zip tied the ECU up to the battery cradle
  • Located the two ring terminals, but didn't connect them as we were sure were to connect them
  • Checked the brake light connections (already connected)
  • Routed the Lambda cable to the RHS of the engine bay
  • Connected the positive and negative cables to the battery cradle and routed down to the bell housing (negative) and starter motor (positive). We didn't connect them as there seem to be 3 threads to connect to and no reference as which to use?!
So having visited the wiring once again, its a task left in complete! :-(


Job 50 - Accelerator Cable

Easy to fit the cable, but as with other builders the accelerator pedal required some brut force (thanks Dale) to bend the pedal to take up the slack in the cable. We did it a little bit at a time and as others have said it took more bending than seems reasonable! In fact the only way to get enough of a bend we needed to put something behind the bottom of the accelerator pedal.
Accelerator Cable attached to the end of the plenum chamber 
Over view of the Accelerator Cable Route - Used zip ties to secure it to the engine lift hop and breather pipe
Accelerator Cable attached to the pedal, which had to be bent beyond a comfortable amount
Job 51 - Clutch Pipe

With the coolant pipework in situ, I was able to route the clutch pipe up alongside the battery bracket to the clutch master cylinder.

Clutch Cable routed under the coolant pipework and attached to the battery cradle
Job 52 - Fuel Pipe

A simple job, connecting the Fuel Pipe coming out up from the transmission tunnel, being careful to route it as once it is connected you can't undo it without a special tool.

Fuel Pipe was easy to route, but took confidence to fit as there is no undoing it once its done!

21 January 2014

Day 14 - Coolant Pipework (3 hours)

I started on this having put it off for as long as I could!

Job 47 - Heater Pipe Work

I decided to start at the Heater end of the pipework as I have seen lots of pictures of other peoples blogs. It was relatively straight forward with using Tom Wood's picture. Thanks Tom. 
Holts Rubber Lubricant - Your best friend for this job
Heater Tubing in place - Lots of zip ties used to keep things in place 
Pipework going in and out of the Modine
Job 48 - Anti-roll Bar drop links

Having fitted the Anti-roll Bar I looked to fit the drop links using the bolts provided which were different lengths! Confusing or what! A call to Derek to see what the setup should be.

One side fitted fine
The other side didn't
Different bolt lengths?!
Following a call to Derek he confirmed that the short bolts should be used and arrange to send me a couple out along with a spade connector and nut to connect to the brass T piece.

19 January 2014

Day 13 - Breather & Expansion Bottle Fitment (2 hours)

Just a few small jobs for the day, which as usual take longer than you ever expect! :-)

Job 44 - Breather Bottle Fitment

This was a nerve racking job, involving more drilling into the chassis. The difficulty being the location and trying to get a drill into the area.

Drilled Breather Bottle Mount ready for riveting
Breather Bottle Fitted (before the breather pipe hole has been drilled)
Breather Bottle in place with breather pipe pipe fitted - took some readjustment of the pipe to fit

Job 45 - Expansion Bottle

An easy job, but in order to get the pipe routing correct, you have to position the mount sideways as in the picture above. I hadn't realised, but the chassis is threaded for bolt to screw in to.

Expansion Bottle Fitted
Job 46 - Heater Valve Cable

Following my earlier task fitting the Breather Bottle, I was feeling brave with the drill so I decided it was time to drill the hole for the Heater Valve Cable. This was a case of drilling through the bulkhead into the passenger compartment. I'm not sure if this is done for you if you specify a heater at order stage. Fortunately I drilled it in the right location.

From the engine looking in
From inside the passenger compartment

18 January 2014

Day 12 - Fitting the De Dion Ears, Hubs & Rear Calipers (5 hours)

Further to confirmation from Derek at Caterham via photos that Caterham's fitment of the drive shafts was similar to mine I moved on to finishing the rest of the items related to the De Dion Tube. Having already loosely constructed this on the work bench in order to fit the brake pipes, I thought this would be a relatively easy job! :-). Everything I had done previously was confirmed by information provided by Derek and Andrews Bissell's very helpful photographs on his blog.

Job 39 - Fitment of the De Dion Ears

This was a relatively easy job once I had the confidence the I wasn't stripping threads. I guess that this is down to the fact that the De Dion tube is powder coated and blocks/fills some of the thread.

Before De Dion Ears Fitted
Ears Fitted
Job 40 - Fitting the rear Hub & Bearing Mount

Again an easy job once the correct bolts have been identified. Make sure the rounded edge is at the top.

Hub Mounts Fitted
Anti-roll Bar Mounts connected to the to the back of the De Dion Ears

Job 41 - Speed Sensor

An easy job provided the sensor aligns with the 'cogged' speed ring on the drive shaft. (Which mine did).
Speed Sensor attached to the Anti-roll Bar Mount


 Job 42 - Hub & Disc Mounting

Fitted easily once the bearings in the hub are aligned correctly. I found it easiest holding the drive shaft horizontal and sliding the hub and disc on. I fitted the first bolt up nice and easily using the Caterham supplied 42mm socket, the other side was a different size though! I ended up doing this up loosely. At this stage the nuts are tightened to 81Nm, but need to be tightened even tighter later on.

Rear Hub and Disc assembly in position with the 42mm nut over the end
Job 43 - Caliper Fittment

I found that fitting the Caliper Mount to the De Dion Ears first, dropping the brake pads sitting on the disc and then dropping the Caliper over the brake pads (not forgetting to put the pad clip in situ first). I then bolted the Caliper on and attached the handbrake cables to the Caliper. Make sure that you loosen off the white nylon lock nut on the handbrake cable, so that it gives you enough slack to fit the lug over the fitment.
Caliper Mount on
Caliper Mounted
Fitting the brake pads

12 January 2014

Day 11 - De Dion Fitment (4 hours)

Following a morning doing some paper work with a friend (Chris Sewell), we moved into the garage and I showed him around the car and what had been done to date. On asking if he fancied assisting with anything we set to work.

Job 31 - Torquing up the Engine to the Rubber Mounting Bolt

Having waited for 2 weeks for a 5/8" Allen key head with a socket attachment we used a couple of wobble bars to reach the bolts. A nice easy job to start with.

Job 32 - Re-attaching the Washer Bottle

A Job definitely aided by having 2 people on the job. Whilst I was underneath the car feeding the bottle and mount up, Chris manoeuvred it into position. Once in position and tightened up we located the washer tube onto the diagonal down tube and used zip ties to secure.

Not a lot of room to fill it!
Job 33 - Engine Wiring

Following this we moved on to looking at the engine wiring! Having read the instructions several times we could figure out some of the wires, but others weren't so easy! I As a result we gave up and decided to move on to the next element! If there is anyone who can offer some assistance it would be greatly appreciated. :-(

Job 34 - De Dion Fitment

After failing at the front end we decided to move the the back end of the car, as I had already fitted the brake pipes to the De Dion we manoeuvred it into positions from the RHS (it won't go in from the Left as the Brake Union gets in the way!).

Job 35 - Radius Arms

We moved on to positioning the Radius Arms on the lower setting at the front. The RHS front bolt went in nice and easily, the LHS was somewhat more problematic! A bit of gentle persuasion with the rubber hammer saw it through though. I didn't use any copper grease on this as it had a Nylon Loc Nut on the end, wonder if I should have!? Anyone?

Radius Arm mounted on the lower setting
Lower Radius Bolt from inside the car
We then secured the rear of the Radius Arm to the De Dion tube, which again took a little gentle persuasion with our friend the rubber hammer.

Radius Arm mounted to the De Dion - No Copper Grease?
Job 36 - Rear Anti-roll Bar

Following advice from Tom Wood I fitted the Orange Bushes to the rear of the Anti-roll Bar and then fitted to the chassis mounts loosely. The bar sits on some nice Aluminium mounting blocks.

Aluminium Anti-roll Bar mount
Job 37 - A-Frame

Thought this would be a quick job as it looked simple (which in theory it should have been)! It took an age to locate the Nylon Washers, once located we married everything up and looked to put the bolt through A-Frame and De Dion Tube. Again easy in theory, but we could not for the life of us we could not get the bolt through! We decided to take it off again and try it all separately, and guess what, no issue! The only solution after some discussion was to get a file to the paint inside of the A-Frame mount. Bingo it went straight in. :-)

On to the front attachment points, which went in much easier. 4 shims on one side and 3 on the other. Measuring up provide confirmation that the De Dion was centred to within 1mm. :-)

As advised by others I checked the arc of travel for the rear suspension, very close to the LSD plug!

Again I haven't Copper Greased these as they had Nyloc Nuts on the end.

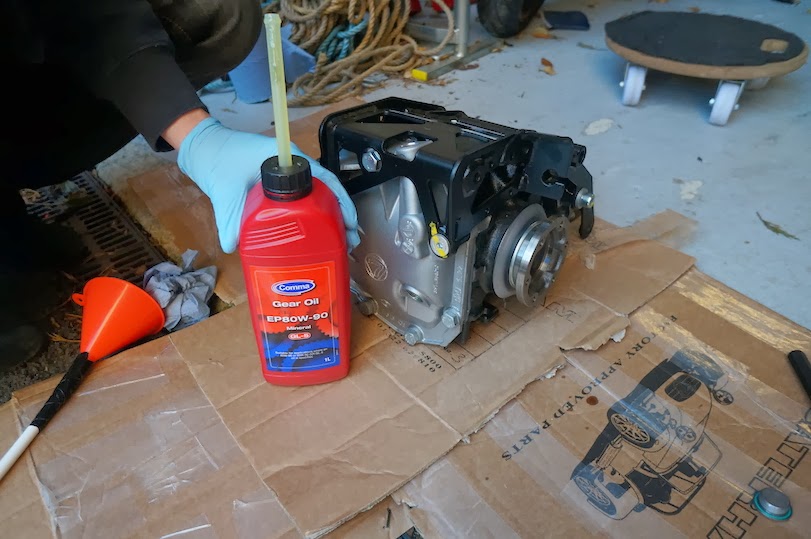
Job 38 - Drive Shafts

Final job for the day was to fit the drive shafts, but in order to do this you need to remove the Dust Covers fitted to the LSD. The easiest way to do this was to use a screwdriver between the covers and LSD housing. Chris and I worked from the top and bottom until it loosened. It was simply a case of pulling the covers out! What a smell! (I had put the LSD oil and additive in already).

RHS Dust Cover prior to removal
LHS Dust Cover half removed
View of inside the LSD with the Dust Caps removed
As recommended in the manual we used some bearing grease on the end of the drive shafts and inserted them accordingly (as they are different lengths).

Inserting the drive shaft into the LSD
Having positioned each drive shaft in to position the manual says you need to knock them in. Something we tried, but I don't believe that they were located properly as the Dust Caps to not butt up to the drive shafts as I would expect. Can anyone shed any light on if this is correct?!

Drive Shaft inserted into LSD - Not sure if it is far enough in!?

3 January 2014

Day 10 - LSD Fitment (3 hours)

The aim today was to get the LSD fitted to the car with some assistance from Alex, but I had some additional help from his wife Charlie and my Dad.

Job 27 - Fixing the Brake Pipes to De Dion

First job of the day was to fix the brake pipes to the De Dion, using the pop riveter for the first time (What a great tool, very satisfying to use - wonder if I will say this by the end!). As described in the manual we fitted the brake union and then the brake pipes to that. Once connected we manoeuvred the long (LHS) pipe into position and secured brake pipe into the caliper before fixing the pipe with P clips and rivets.

Using the Pop Riveter for the first time. :-)
We then started on the short (RHS) pipe and did this slightly differently. We fitted to the brake union and then secured to the De Dion moving along the P clips. We then searched the garage for a suitable tool to bend the pipe around to the brake caliper, the weapon of choice ended up being a 21mm socket, which gave a nice curve to the pipe allowing it to be screwed into the caliper.

All 3 brake pipes fixed, before removing the calipers & De Dion Ears
Job 28 - Fitting the Propshaft

Before we went any further we positioned the propshaft in the Gearbox and rested on the tubing above at the back of the passenger compartment. An easy job.

Bolted to the LSD
Job 29 - Filling the LSD

I decided to follow the instructions at this stage and having contacted Derek about which fluid to use he advised the 80W-90 for the LSD and the 80W-80 for the gearbox, so we built a funnel it.

Funnel for filling the LSD
Only to find the bottle has a tube for exactly that purpose!

Job 30 - Fitting the LSD

Having heard numerous nightmares about fitting the LSD we started cautiously! Using the jack to lift the LSD under the car we located 2 screwdrivers through the mounts into the top mounts of the Diff Carrier. We then inserted the lower bolts and measured up to get an idea before inserting the shims. We fitted 2 shims to each side giving centring the diff to about 1mm. The easy bit done according to others, the tops being harder to fit!

At this point we made sure that the handbrake cables were fed through underneath the top 'mounting screwdrivers' and the RHS nylon adjuster attached to the Diff Carrier.

Right hand side of the LSD

Left hand side of the LSD

Having taken the boot floor out of the car it made access to insert the top bolt much easier. Taking one of the screwdrivers out and applying lots of copper grease to the 11" bolt I placed it in and started to tap it through from underneath whilst Alex inserted washers in between the Chassis and Diff mounts. As I knocked the bolt through it knocked the screwdriver out and hey presto we were there. Easier than we thought!

LSD looking through the boot floor

2 January 2014

Day 9 - De Dion Tube Preparation (2 hours)


I was on my own today so spent another couple of hours sorting a couple of things out on the car along with a couple of things on my tin top.

Job 26 - De Dion Tube Preparation

Having looked through the instructions a couple of times I couldn't seem to see what bolts were required to fix the De Dion Ears & Calipers to the De Dion, the only information in the manual mentions a couple of bolts (which I have found out are no longer used!). So I decided to lay them all out on the work bench and see what was present against the package list.
Parts all laid out on the work bench - checking off against the list
Having located all the parts I required, I attached the De Dion Ears, Hub Mounts & Calipers and then loosely attached the brake pipes which aren't a great fit as standard! See below
LHS Brake Pipe - Not a great fit requires bending to fit
LHS Brake Pipe - Not a great fit requires bending to fit (Looking Down)
RHS Brake Pipe - Not a great fit requires bending to fit
RHS Brake Pipe - Not a great fit requires bending to fit (Looking Down)
Other jobs completed today were:
  • Contacted Derek regarding missing parts and to ask some questions
  • Torqued up the Uprated Master Cylinder to the mounting (20Nm according to Derek)
  • Removed the washer bottle mount - having not done so previously (hadn't realised it could be removed by 4 bolts!) The washer bottle sits very loosely in the mount and may jump out, but I have been informed that Caterham will check this at the PBC - Must remember that!
  • Removal of boot floor to allow easier access for mounting the LSD
  • Picked up Go Pro Roll Bar Mount from Argos (was on offer)