10 March 2014

Day 35 - Rear Lights, Brake Bleeding, P-Clips & Restarting (2 Hours)

I had a number of jobs to complete today to do with the other vehicles in the garage! The main task was to get the KTM MOT'd so I didn't spend much time working on the Caterham today.

Job 101 - Fitting the Fog, Reversing & Number plate light

Now that all the work has been completed on the paint work I decided to start putting the bits I took off before painting back on the car.An easy job which simply required re-bolting them all in place.

Fog, Reversing & Number Plate light refitted
Job 102 - Re-bleeding the Brakes

Roger popped around for an hour so we took the opportunity to re-bleed the brakes which didn't take long.

Job 103 - P-Clipping the Handbrake Cable

I had never really been happy with the Handbrake fixing solution in the manual (Zip ties)! So when I saw that Andrew Bissell had used P-Clips to fix the cable, a much better solution in my opinion! I shamelessly copied it. :-) Thanks Andrew.

Offside Handbrake Cable
Nearside Handbrake Cable
Job 104 - Restarting

Following the first start last night I wanted to restart the car at a decent hour, but despite being on charge all evening the car wouldn't start properly, it just clicked!

I discovered after a lot of head scratching that it was because the battery terminal connections weren't great. I ended up removing the terminals, wire brushing the battery terminals, a dab of copper grease and replacing a 'furry' battery bolt and bingo, it started straight off. Happy Days. :-)

9 March 2014

Day 34 - Bleeding the Clutch & Brakes, Exhaust Fitment & First Start

For the last week the plan was to try and start the engine for the first time today when all my family were available to come and see it take place! Katey, Alex and Charlie were around for the day whilst the rest of the family were coming around for 6.30pm! A deadline to aim for then!

Job 96 - Clutch Bleeding

In order to make todays job easier, the car was placed back on the axle stands and the wheels and wings removed to allow better access.

Having purchased a Brake bleeding kit previously for use on the bikes, I decided it would be wise to try and use this to start with.

Mityvac Brake Bleeding Kit - Cost that much and had limited use, thought I'd best use it! :-)
We started by cover up the area around the clutch and brake master cylinders with clothes to soak up any spilt brake/clutch fluid as it was going to be inevitable at some stage some would be spilt!

We then raided my tool chest to see what we could use to open the awkwardly located bleed nipple and we found just the ticket, a goose necked spanner which again was purchased for working on the bikes! This allowed us to up the Mityvac pipe over the nipple and still open it.

Using the Mityvac to bleed the clutch
Filling the clutch master cylinder very carefully (it only takes a tiny amount) using a funnel and measuring jug we started by opening the bleed nipple and pumping the Mityvac which sucked the fluid through. This seemed to work well initially and the clutch gained some weight to it.

We finished it off traditionally by pumping the clutch and then releasing the bleed nipple. We will have to wait and see how we get on when we start it later. Fingers crossed. :-)

Job 97 - Brake Bleeding

Having successfully completed the clutch we moved on to the brakes (not planned, but made sense as the clutch had gone so well) and started by checking all the brake unions and attachments were torqued up using the torque wrench and the crows feet. We then followed the instructions in the manual, with the aid of Charlie sat in the car pumping the brake pedal, Katey with the camera. It was like a game of innuendo bingo and helped pass the time with Alex and Katey both ending up very red at one stage!! :-)
All in placed ready to bleed the brakes
As you can imagine the first Caliper took a while to bleed as the fluid needed to make its way around the whole system. We opted not to use the Mityvac as there for this as Charlie was helping.

First Caliper being bled
Topping up the Master Cylinder
Even Charlie had to take her shoes off! Nice socks by the way! ;-)
Having the AP uprated brakes the front brakes both sides of the calipers need to be bled starting with the inside moving to the outside and then across to the front RHS.

Frothy brake fluid - plenty of air being bled
Once we had finished at the front left hand side we went around all the brakes again.

Job 98 - Exhaust Fitment

Now that the 3M Scotchguard had been fitted we could fit the exhaust. We started by by fitting the bobbin to the side pannel and easy enough job, but no details on how tight to torque the bolts.
Exhaust Bobbin Fitted
Having removed the gasket from the engine and all the masking tape, we then laid out the exhaust manifold on the ground in order and copper greased the manifold bolts.

Looking down one of the outlets
Manifold laid out
We then fitted as per the instructions which went well until the last pipe needed to be fitted which was a tight fit and we ended up bending the skin hidden by the cardboard we had placed around the hole in te side. Could have been worse though!

First Manifold Pipe in place]

Manifold in place ready for the collector box to be fitted
The next item to fit was the collector box with the lambda sensor attached which once aligned was tapped into place using a rubber mallet and a block of wood.

It was simply a case of fitting the silencer and collector box guard and then tightening everything up so that it didn't move. There was quite a bit of movement in the silencer and as a result we fixed it so it was tipped a bit on the basis that if any excess fuel/condensation would be able to flow out!

Exhaust Fitted - Supplied with lots of scratches and a couple of dints! To be replaced at the post build check
Job 99 - Fuel Tank Earthing

Simply a case of lifting the boot floor and attaching the ring connector to a rear wing bolt for the time being.

Job 100 - First Start

By 7 o'clock we were ready to try and start the engine! Not bad timing wise! Following a fluids check and couple of trips to the petrol station and about 18 litres in the fuel tank it was time to try and start the car!  This is where the fun began!

Following the instructions provided by Caterham we did the following:
  1. Disconnect the Inertia switch
  2. Run the engine (starter moter), for ~30 seconds.
  3. Watch that the oil pressure comes up.  Mine hit about 3 bar.
  4. Connect the inertia switch and press the button.
  5. Turn off then on again and press and hold the start button.
  6. At this point I should have heard the fuel pump, but nothing!
  7. Repressed the inertia switch and tried again, still nothing!
  8. First thing to check was the battery which had been sat on an Optimate since the battery had been connected! About 11 volts!
  9. At this point my dad popped home to get a battery charger and we connected it on his return while we left it and had some tea.
  10. Returning after tea with the we tried again and it started. What a great feeling :-)
  11. The idle seemed to be about 1500.
  12. I watched the oil pressure go up to 6 bar when it was cold. Left it for a minute as Caterham suggested and stopped it again.
  13. Checked fluids and identified a couple of coolant leaks - One at the T-piece with the temperature sensor and one at the connection with the water rail
  14. Once tightened we refilled the coolant.
  15. Tried to start again and nothing, so re-connected the battery charger and put on start mode.
  16. Again the engine started and settled at 1500rpm.
  17. I left the engine running to warm up to coolant and oil.
  18. The oil pressure dropped to 2 bar when it was warmed up.
  19. I sat in the car and tried to select all 5 gears, no crunches and the and the rear brake discs rotated, so happy that the clutch is working.
  20. Revving the car took the oil pressure up to 4 bar and 6 bar.
  21. At just over 90 degrees C the fan kicked in and the temp dropped to ~80-85 degrees.
  22. As soon as the temperature dropped down and the fan switched off we turned the car off happy with progress as it was 10.15pm at the time, I didn't want to upset the neighbours too much!
  23. Final job of the day was to connect the Optimate to try and charge the battery over night in the hope the engine would start properly the following morning at a more respectable hour!
A couple of photos of the start up:

The first two passengers with the engine running!
Idling at 1500 rpm and quieter than we all thought! A good thing given the time!
Oil pressure sat at 4 bar and temperature gauge rising

8 March 2014

Day 33 - Paint Protection Preparation & Application (7 Hours)

Job 95 - Preparation

I dragged Katey out of bed to help me get ready for Dave arriving! Thanks for your help Hun. x
  • First job was to switch on the electric heater to warm up the garage
  • Refit the cycle wings a nice quick and easy job
  • We refitted the rear wings and rubbers
  • Loosely fitted the wheels
  • Swept the floor & used the air compressor to blow any dust/polish off the car
  • Lowered the car off the axle stands - As I have no brake fluid in yet, I put the car in gear and lowered the rear end first
Rear End Lowered - Thank goodness for my low profile jack!
  • Then lowered the front end of the car - First time it had been on the ground and I forgot how low they are! Made Katey and I both laugh 

On the floor for the first time! :-)
Ground clearance or lack of! :-)
  • Sat in the drivers footwell (no seats yet) and both grinned gormlessly!

Katey Initially got in the passenger side, I let her sit in the drivers side this time. Don't get used to it! ;-)
  • Fitted the nosecone & bonnet
Job 96 - 3M Scotchgaurd Fitment

Dave from Premier Paint Guard arrived at 10.30 and after a cup of tea we went out to the garage to look at the task in hand. First of all Dave measured the temperature of the panels and we discovered that it was some were a little too cold, so it was on with the Propane Heater.

Dave started with fitting film to the flat panels the rear filler cap protector was first

Dave's mobile office set up and ready to work
Filler Cap protection applied - Can you see it?!
Dave had pre-cut most of the panels prior to arriving with templates he has created over a number of years, but the side panels are cut to fit on the car using a template that is created by applying a film to the car and then marking up.
Side Panel template film in position
Dave removing the side template
Cutting the film from the template
Dave completed the work at about 4pm having added an additional strip to cover the top of the boot. I am really pleased with the results of the work that Dave has done and would highly recommend any others building theirs to use Dave at Premier Paint Guard either for supply only or to use his fitting service. Highly recommended.

7 March 2014

Day 30, 31 & 32 - Stone Protection - Inside Wings (3 Hours)

Job 94 - Applying Tetroseal

Further to information and advice provided by others I decided that I wanted to reduce the risk of starring in the wings from stone chips! I had spent a bit fair bit of time looking into possible solutions and ended up asking at my local motor factors when I visited. I was advised to use some Tetroseal as it has a rubber consistency that protects the surface it covers, reducing noises and hopefully reduce the risk of starring. Time will tell!

The tin recommended a 2mm thick coating, so I applied 3 coats over 3 days. It says it drys in 2-3 hours, but I found it took longer, probably due to the cold temperatures! Make sure that you have some white spirit to hand as you are likely to get some on the paint!

Painting the Rear Wings - Gloves are definitely needed!
 Tetrosealed cycle wing above standard unpainted wing
All 4 wings painted

3 March 2014

Day 29 - Torquing the Back End & Fitting the Boot Cover (2.5 Hours)

This weeks tasks involved preparing the car ready for Dave at Premier Paint Guard to come and apply Scotchguard protective film on the paintwork. In order to do so I would need to put the car on the ground so Dave would have a solid/static car to work on.

Job 91 - Torquing the back end

Dale popped around to help this evening which meant that i had someone else to double check the torqued bolts and provide piece of mind. :-)

Job 92 - Relocating the Speed Sensor

The speed sensor socket came zip tied to the chassis inside the A-Frame, which didn't sit well with me as it is a thin wire that could easily be sliced by the Anti-roll bar or A-Frame! We routed the socket and the wiring as neatly as we could up the back of the bulkhead along with other wiring.

Relocated Speed Sensor away from the A-Frame
Job 93 - Fitting the Boot Cover

Having asked my Mum to remove the metal bar out of the Boot Cover, the boot cover was ready to fit. First of all we offered up the cover the the rear bulkhead behind the seats and marked the location of the harness bolts opening them up with a Stanley knife.

We positioned them as instructed an started to tighten and this is where the issue came! Every time we tightened the bolts it rucked the cover, we tried applying some grease to the top of the cover, but still no joy! Does anyone have any other ideas?!

Boot Cover Loosely fitted before the rucking!

2 March 2014

Day 28 - Coolant, Engine Oil & Rubber Floor Mats (2 Hours)

I only wanted to spend a couple of hours out in the garage today as I had run out of gas for the heater! Soft lad i know! :-)

Job 88 - Coolant

Having purchased the first fill pack from Caterham i decided it was time to put some coolant in, so I went around all of the Hose Clips and checked they were tight enough and then started to add coolant to the expansion bottle. Putting in about 4 litres before realising that one the Hose Clip attached to the water rail at the back of the engine was dripping! A quick tighten and all was well.

Filling through the expansion chamber first 
I took Tom Woods advice and started to add some to the radiator until it was full.

I then moved on to filling via the pipe between the Heater and the Modine until the level sat steady at the maximum line.


I ended up using all 5 litres supplied and had to buy some more from a local supplier to complete the job!

Job 89 - Engine Oil

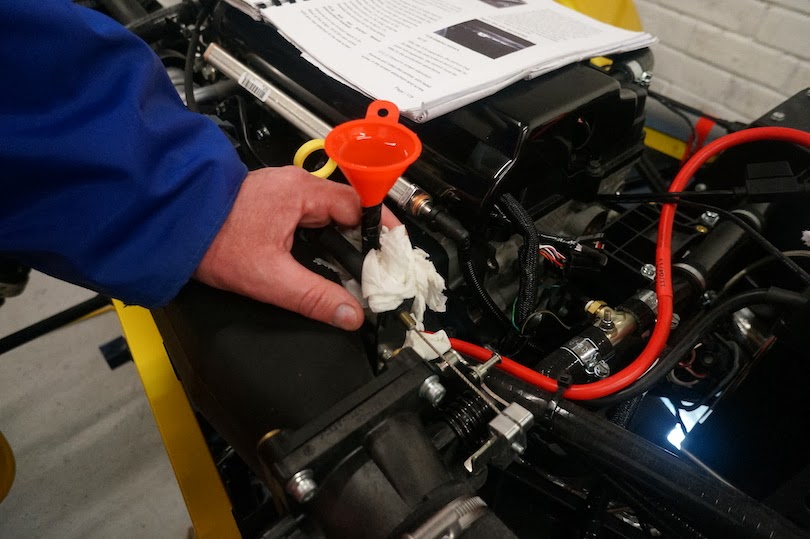
This was filled via the top as you would expect. I filled from the bottle supplied using 4.5 litres initially as I aired on the side of caution to begin with. Leaving it whilst I moved on to the Floor Mats I came back to it afterwards and checked the dipstick and nothing. I guess I will be adding the remaining 6 litres to suit my engine.

Job 90 - Rubber Floor Mats

As with many jobs at this stage, it took longer than I was expecting with a break in the middle to show my Mum, Dad and Sister progress to date. Showing them a couple of other bits including the tiny steering wheel and amusingly small windscreen wipers!

I started by placing the mats in the foot wells to see how they sat. Length wise spot on, width wise a little wider than the lowered floors.

Measuring for the popper base locations
I tried to decide where best to fix the poppers and once I had decided I drilled the holes and placed the popper base and rivet in place. The first rivet ended up loose and I realised I had read on Andrew Bissell's blog that in order to get a tight fit he placed spacers small enough to fit inside the popper base allowing for the riveter work as it should. I ended up using spring washers as that was all I had that would fit, but I will need to find a better solution for re-fixing the rear popper bases!

Drilling the holes, pilot hole before a 4mm bit
On fixing the bases, I fixed placed the mats in position and pushed down on the popper bases to make an imprint in the bottom of the mats.

Using the Dura dot Tool for the first time - Its a rubbish bit of kit in mu opinion.
I then drilled holes through the mats and used the durable dot tool to secure the popper top to the mats. Job done. :-)
Popper Bases and Tops before fixing the mats
Mats fixed in place

25 February 2014

Day 27 - Carbon Stone Guards & Gearbox Oil (4 Hours)

Dale joined me for a couple of hours, or that was the plan! Thanks Dale. :-)

Job 86 - Carbon Stone Guards

Following the removal of the rear wings yesterday, it seemed appropriate to position and fit the Carbon Stone Guards on the rear wings. With 2 of us working on them it was an quick and easy job.

Carbon Stone Guards lined up ready for riveting
 Job 87 - Gearbox Oil

Oh my lord! What a painful job this was! We started by trying to manoeuvre a pipe supplied by fellow builder Andrew Bissell, but being an S3 it is very tight between the gearbox and transmission tunnel I couldn't get the pipe to sit securely in enough, more oil ended up in the catch tray than the gearbox!

Next course of action was to find some thiner pipe, we ended up using some left over washer pipe! It was somewhat thinner and as a result it was easier to insert, the flip side being that it took us just over 3 hours to put 1.3 litres of gearbox oil in the gearbox! Plenty of time to chat and catch up!

Filling the gearbox using pipe and a tiny funnel!
Pipe running along side the transmission tunnel into the gearbox
Once the oil started dribbling out of the gearbox it was time to get the plug in! A messy job it had to be said, but the plug & allen key solution worked a treat. I used a 10mm spanner to turn the allen key and hence do up the plug a quarter of a turn at a time.

It took a bit of time to get the plug correctly aligned so that it would bite in the tread of the gearbox. I would recommend marking up the plug with a paint pen in the location where it bites before putting the oil in the gearbox.

My recommendation to others, fill the gearbox before it goes in the car! I hope these tips help someone else!